Card Making Tips Making Your Cardmaking Time Enjoyable
Must-read card making tips to make your cardmaking time fun and stressless.

As time goes on, more tips will be added here. So do check back often to get the latest tips.
Card Making Tips
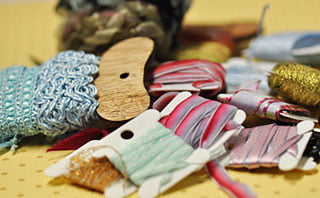
Use wooden, cardboard or plastic floss cards to organise your ribbons. (refer photo above)
Keep all the scrap paper. You can use them to punch out punchies. (punchies: what you punch out with your paper punches).
Put a pack of Baby Wipe nearby to clean your rubber stamps in-between change of colors.
Ink your stamp with Versamark ink before using Stazon, Brilliance inks or any other difficult to clean ink.
Use washable inkpads when making cards with children. Children love to stamp on their hands, arms and faces.
Keep a notebook beside you on your bedside table to jot down card making ideas in the night.
Shake your chalk re-inker by putting it in a sock and spin it!
If the rubber on your rubber stamps are turning white, apply a light coat of glycerin over the rubber to avoid ghosting. You can find glycerin at your local pharmacy.
Not sure what color card to use to layer your image on? Choose a color from the image.
Lightly sand your shrink plastic first before stamping on it.
Dip a brush in water and paint your shape on the paper, pull paper apart with your hands to give a lovely feathered edge to your shape.
Stamp some images on white cardstocks with black pigment ink and carry them in your purse with a small pack of color pencils. Color them during waiting time.
Store your markers horizontally.
Store your not so juicy inkpads upside down to let the ink sink to the top of the pads.
More Card Making Tips
Use the back of the mousepad to stamp, emboss foil or to shape your paper or punchies.
Dab a bit of glue on the end of the thread to stiften it before you thread your beads.
Make some everyday cards without any sayings. When you need a quick card for a birthday or to say “Thank You”, just add the words.
Use poly bags to store your ready-made cards especially if you have included some 3D embellishments.
If you have to have beverages while working on your cards, place your drinks on a separate side table.
Dab a blob of repositionable adhesive on the back of card or elements that you want to attach to your main card blank. Move them around till you are sure about their placements.
To make your masking tape less sticky, just stick it on your jeans or skirt first.
Store your rubber stamps away from direct sunlight and heat.
Apply a little clear nail polish to end of ribbons to stop fraying.
Use lighter-weight paper for layering to save postage.
Fold card outside in to protect delicate embellishments on front design when posting.
Cover mistakes with embellishments, layering or adding another image on top.
Keep a small box beside your craft table to throw in your paper scraps while you create.
Organize your paper scraps while watching tv or during downtime.
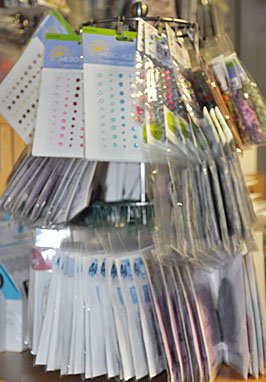
Put your most used embellishments and stamps in a nearby drawer or a revolving hanging shelf (photo below) so that they are within reach everytime you’re creating.
When layering smooth card onto another smooth cardstock, lightly sand the two surfaces to give your glue some grip so that they stick better and longer.

Card Making Tips Contributed By Cardmakers
When I began making cards I found card stock to be very expensive. So I bought posterboard, which is much cheaper and cut into card size pieces. The cards have turned out very nicely. ~ contributed by Bess Gle (USA)
Put loose glitter/sparkle in a salt or pepper shaker for easy distribution. ~ contributed by Janice Swift (Australia)
When folding your card stock, use one and a quarter inch wallpaper roller on the fold for a professional look. ~ contributed by Janice Seastream (U.S.A.)
Keep a box to put cards in after you make them so they don’t get damaged. ~ contributed by Paige Preston (Australia)
Can’t find gold card for matting? Cut a piece of scrap card to size and use a gold marking pen to outline it, and when attached you can’t tell. Use this with other colours too. ~ contributed by Joan Perry (UK)
I was in a dollar store looking around for some different textured paper for cards and I happen to look at some of the gift bags hanging up and there were some really cool metalic colors, reds, golds, blues and the designs were really neat. I purchased a couple of large ones to experiment with. I opened the bag up at the seams completely and measured and cut the paper to different sizes and I added them to cards I was working on, bookmarks for extra flair, etc. You can use your imagination. They turned out really well. ~ contributed by Darlene Watts (U.S.A)
 US
US CA
CA
